Cook Like A Cheesemonger: Spaghetti & Meatballs

Oh, life is busy! I grew up with four lively siblings, and parents that had very busy careers. We were always on the go, whether it was after school events, weekend sports, theatre, camps, social activities, you name it, we were involved. We did it all! In between juggling our crazy schedules, my Mother managed to make sure we had delicious and nurturing dinners, and there is one that I always fall back on when I’ve had a long day. It’s very simple, and extremely satisfying. It’s a variation of Marcella Hazan’s famous tomato sauce, with fresh herbs, and homemade meatballs. Yes! It’s loaded with butter, ok! But the butter really brings you all the “feel good feels,” and gives the sauce an unparalleled velvety richness that you truly can’t beat. France44 Cheese happens to also make some incredibly delicious fresh pasta every week (lucky us!) This is one of the quickest, most satisfying dinners, that will put you in the best state of mind and leave you wonderfully content. 

Ingredients:

1 lb of F44 fresh pasta (I used spaghetti) 

Sauce- 

1 28oz can of San Marzano tomatoes

5 tablespoons butter 

1 tablespoon sugar

1 whole onion, peeled, sliced in half 

Fresh basil to finish

Salt to taste 

Meatballs- 

1/2 cup breadcrumbs 

2/3 cup milk

1 lb F44 House Grind/or Italian sausage 

1/4 medium onion finely diced or grated

2 cloves garlic minced

1 large egg beaten

1 tsp salt or to taste

1/2 tsp black pepper

1/4 cup Parmigiano-Reggiano

1 tbsp fresh parsley

Directions:

  1. Make the sauce. Put the canned tomatoes in a saucepan, add the butter, onion, and salt, and cook uncovered at a very slow, but steady simmer for about 45 minutes, or until it is thickened to your liking and the fat floats free from the tomato.

  2. Put all of your meatball ingredients into a large bowl, and mix by hand. With clean wet hands, shape into whatever size meatballs you’d like! Mine were around 3 ounces.

  3. Place meatballs on a parchment lined sheet tray, and broil for 10 minutes. (I finish them in the sauce for another 15)

  4. Once your sauuzz has been cooking for close to an hour, take out the onion and discard. Add your meatballs!

  5. Bring a large pot of water to a boil, and toss in your fresh pasta. It literally only takes a couple minutes to cook.

  6. Put all these things together, and finish with fresh basil. You’ve won. Like, truly. Enjoy!

What's the best way to store cheese at home? Part II

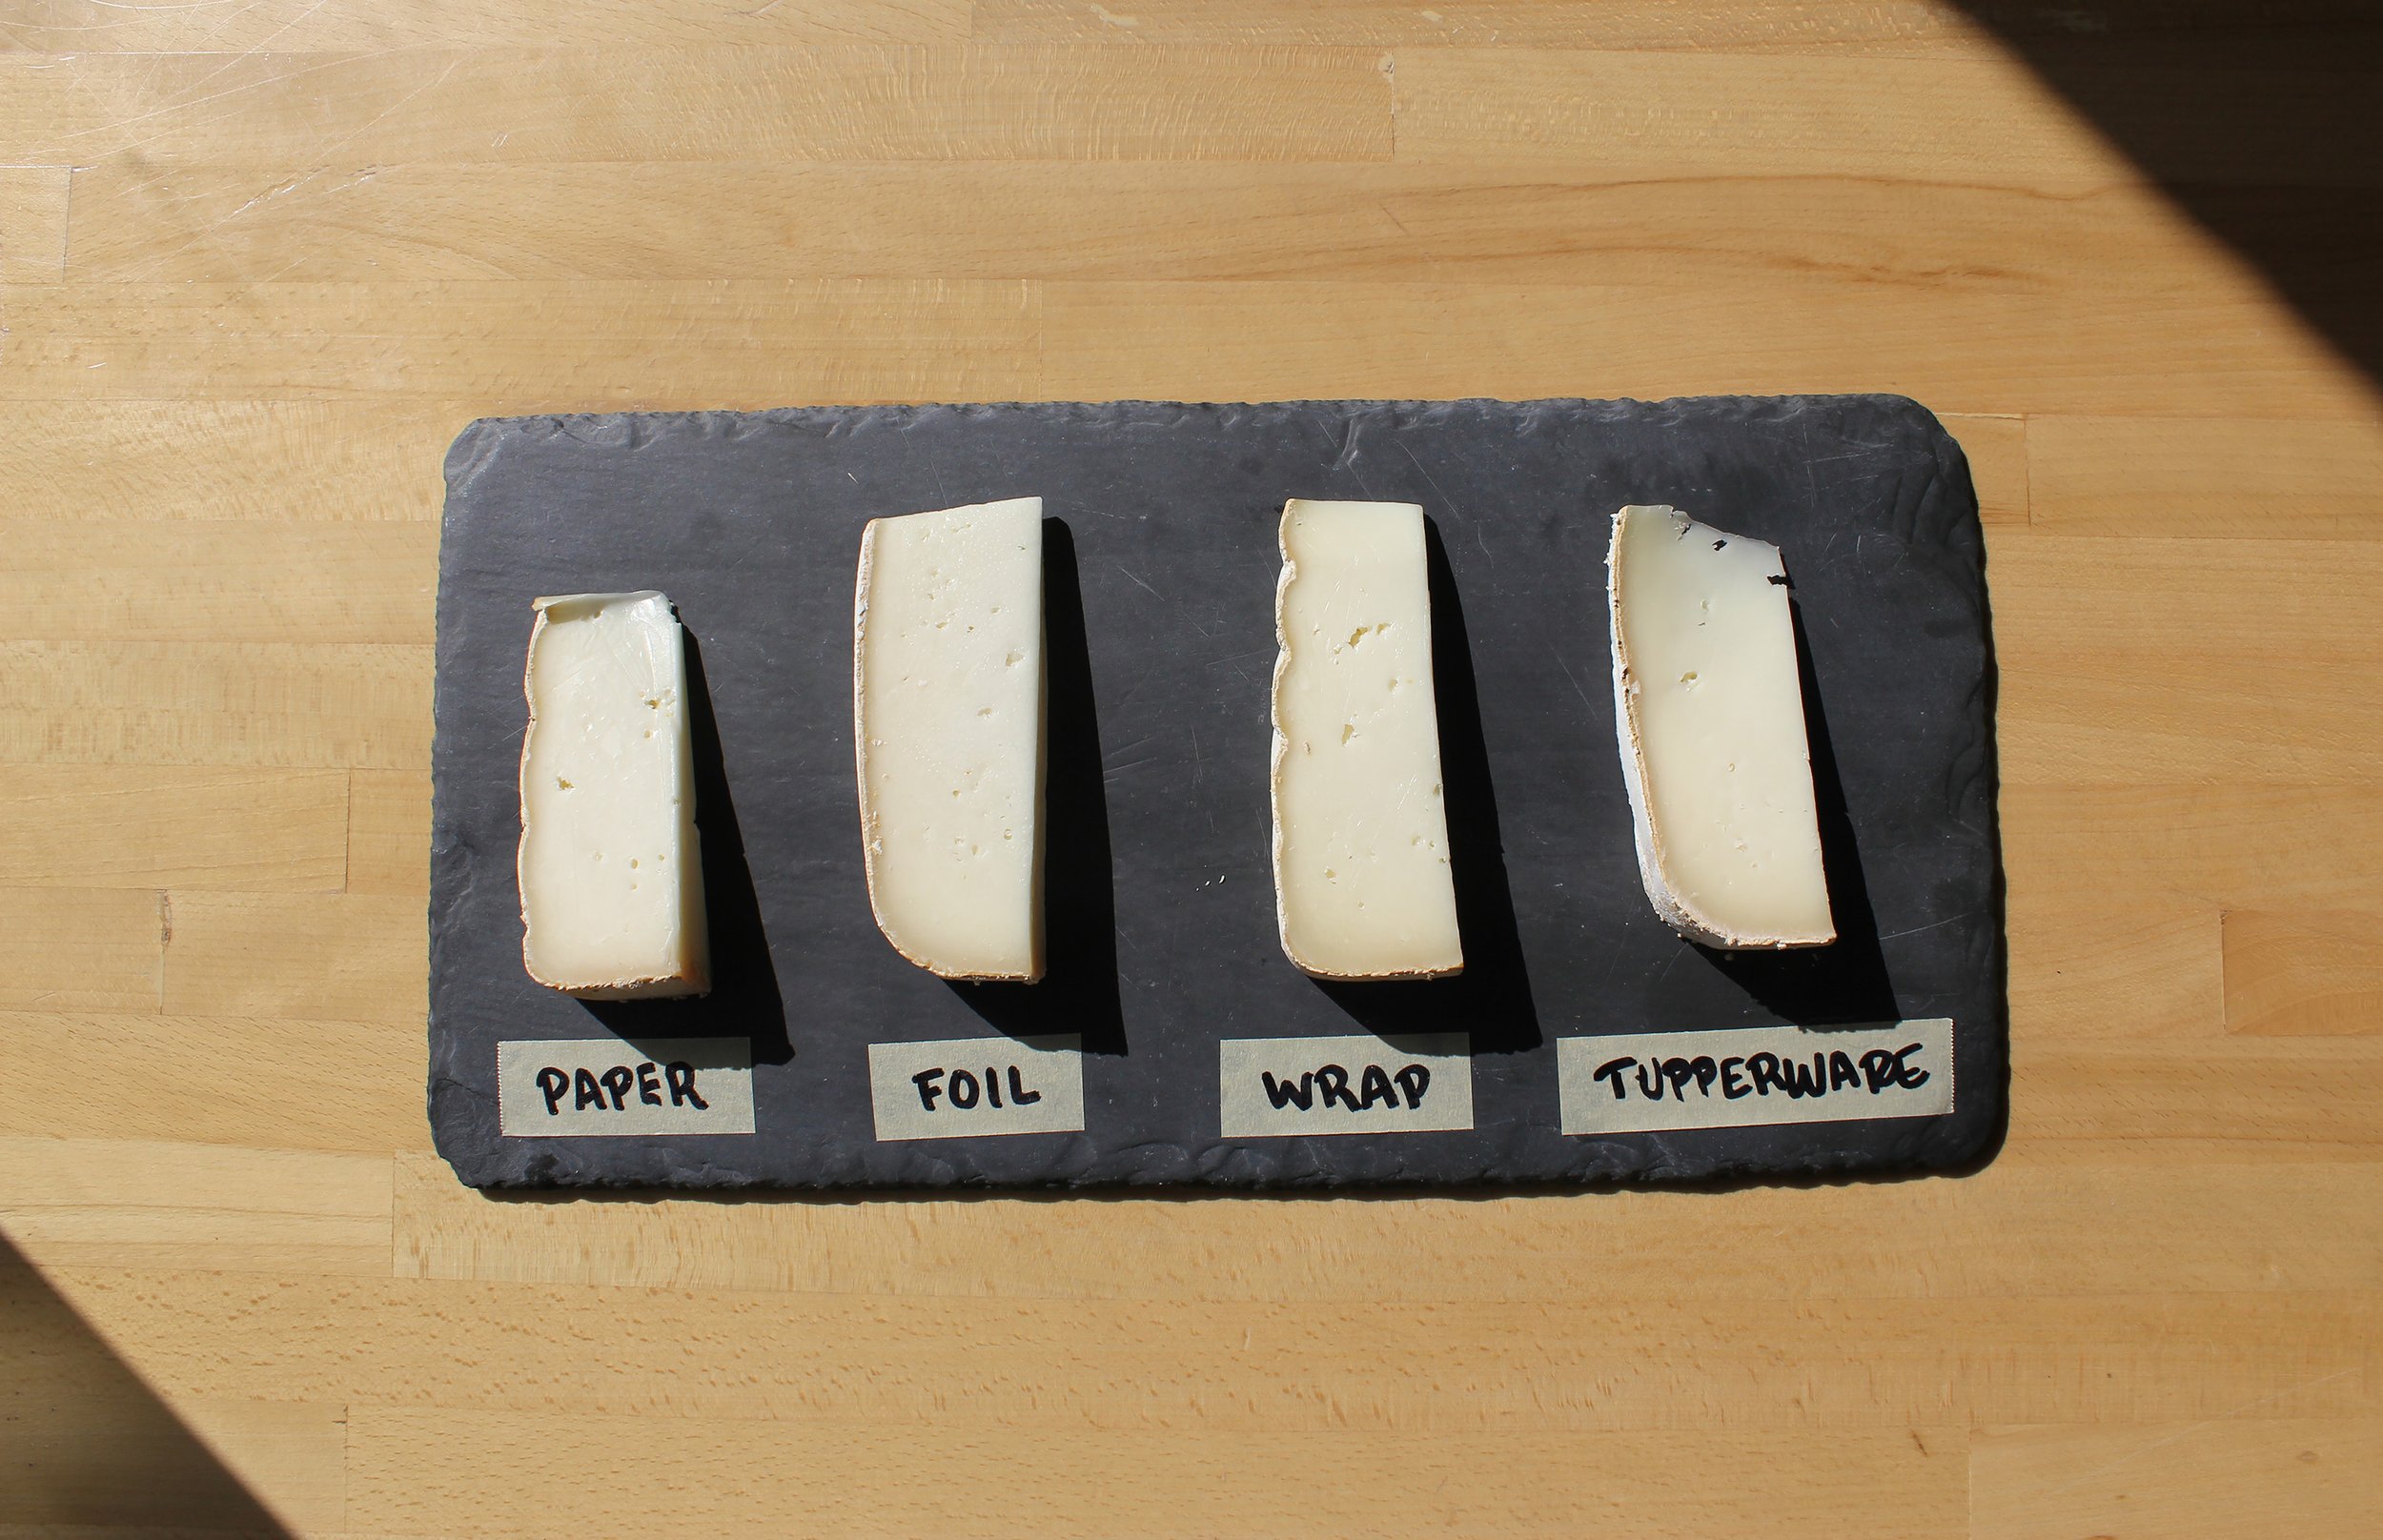
Last week, we set up a casual experiment to test four of the most recommended cheese storage methods: cheese paper, foil, saran wrap, and Tupperware. We allowed four small pieces of Chebris to age for seven days in the less-than-sterile environment of the F44 Wine & Spirits staff refrigerator. No fancy humidifiers or wooden shelving here, only the harsh fluorescent bulb and stale air of your typical home fridge. After a week, we opened up the four test subjects with great anticipation. The results…

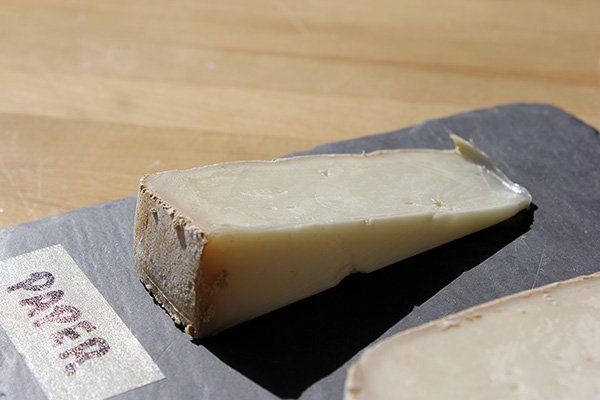
The good news is: all of the cheeses still looked and tasted pretty decent. There were no visible mold growths or spots of serious oxidation, which are typically the first harbingers of cheese death. A couple of the samples were looking a little crisp around the edges (pictured), but nothing that concerned us.

The paper-aged sample shows signs of drying around the edges.

  1. The Winner: Foil

    Surprisingly, foil proved to be our favorite storage method. Tasters agreed that the foil-wrapped cheese remained the most creamy and still tasted fresh cut from the wheel. The foil wrap kept out fridge odor completely, while keeping moisture in.

  2. Cheese Paper

    It’s no surprise that cheese paper stores cheese well. The paper is designed to do this with a paper exterior and breathable poly-lining. Our only gripe with this method was that the cheese did show signs of dryness encroaching around the edges.

  3. Tupperware

    Similarly, the Tupperware-encased piece of Chebris showed signs of drying out, but not as much as we expected. This proved to be an effective way of keeping fridge odors out, and would probably be a great way to store larger pieces of cheese in the fridge.

  4. Saran wrap

As we hypothesized, the saran-wrapped piece of cheese tasted by far the worst, with notes of plastic and stale-fridge odor apparent. This cheese also appeared the most oily and sweaty, having not been allowed to properly breath within the cling film. (Granted, we’re nitpicking here! These cheese was still mostly tasty and far from inedible, but all things considered, it was our least favorite method.)

While we learned a lot from this brief experiment, our consensus was that a longer aging might be necessary to truly test wrap methods’ durability. Trial two begins today, and this one will run for four whole weeks. The potential for gnarly cheese pics is high, folks. Fellow cheese obsessives, stay tuned.

Cook Like A Cheesemonger: Apple Cake

It’s our favorite time of year, for there seem to be so many things to celebrate: the kids are back at school, the mornings are perfectly crisp, and the holiday season draws ever nearer. For many, next week represents the start of the new year: Rosh Hashanah. We made a traditional apple cake to celebrate, using Zestars from one of our all-time favorite purveyors: Ames farm, based in Watertown, MN. This cake comes together easily using pantry ingredients, and highlights the beautiful fall apples. Whether you're celebrating the New Year, or just a Sunday night, we hope you'll find time to enjoy this deliciously simple recipe. 

Ingredients: 

4 large apples (we used Zestars)

1 tablespoon lemon juice (to prevent apples from browning as you cut)

2 tablespoons margarine (or butter)

1-2 tablespoons sugar

1 cup flour

3/4 cup sugar

2 eggs

1/2 cup canola oil

1 teaspoon baking powder

1 teaspoon vanilla

2-3 tablespoons demerara sugar (optional)

Directions:

  1. Preheat oven to 350º F. Grease and flour a 9-inch round cake pan or springform, or an 8X8-inch square pan.

  2. Peel, core, and cut the apples into 12-14 slices each. Drizzle with lemon juice to prevent browning.

  3. Melt 2 tablespoons butter in a large sauté pan. Add 2 tablespoons sugar, and apples. Sauté for 10 minutes until softened.

  4. While the apples are cooking, mix all of your other ingredients in a large bowl (except the demerara sugar). The batter will be pretty thick.

  5. Add half of your cooked apples (including juice) to your batter and gently mix.

  6. Pour batter into prepared pan. Smooth with a spatula.

  7. Top with the rest of the apples, and sprinkle Demerara sugar all over the top (optional)

  8. Bake at 350 degrees for one hour. Let cool completely. Enjoy!

Alemar Cheese Apricity

by Austin Coe Butler

Apricity. The warmth of the sun in the winter. An evocative, if obscure, word, and a feeling we’re all familiar with here in the north. It’s often felt in moments of stillness and clarity. It’s also the name of Alemar’s newest cheese, an aptly named orb of lactic-set cow’s milk cheese with a warm, tangy flavor and glowing rind. Where does this flavor come from, and what is a lactic-set cheese?

When milk is left to its own devices in an ideal, warm environment, (or in the back of your fridge well past its best by date) the bacteria and microbes naturally present in milk begin to consume its component parts. Lactobacillales or lactic acid bacteria (LAB) consume and convert the milk sugar lactose into lactic acid. The increase of lactic acid makes milk more acidic or “sour,” causing the proteins in milk to tangle into curd. The discovery of this was a two-fold revolution, firstly, because most people (still) can’t process and digest lactose after infancy without gastrointestinal distress, and, secondly, curd forms the basis of cheese. Those curds can be drained from the whey and what was once a seasonal, indigestible, bland, and highly perishable liquid that was oftentimes a vector for diseases is transformed and preserved into a delicious, valuable, and safe food that could be enjoyed at any time.

Many of the steps we associate with cheesemaking are absent from lactic cheese making. Making lactic cheese can be as simple as warming milk, allowing the indigenous cultures and lactic bacteria to curdle the milk (or adding lemon juice or vinegar), and then gently ladling the curd to a form or cloth to spontaneously drain. Lactic curds are not cut or stirred like rennet curds. They are also not pressed. Lactic cheeses have a weaker curd as the acid drives off much of the calcium into the whey and the curd has to be handled gently. This weaker curd is why you won’t see larger cheeses that are lactic set–they are usually small crottins or logs–but this weaker curd is also the secret to their delicate, mousse-like texture. Many ripened or aged lactic cheeses have a little rennet added to them, as Apricity does, to assist in forming curd.

You’ve no doubt had lactic-set cheeses before like cottage cheese, cream cheese, and goat’s milk chêvre, all defined by their fresh, bright lactic tang. The world of lactic cheeses is also fascinating and complex, and lactic cheese can be found throughout the cheese eating world like Indian paneer, Italian ricotta, Tyrolean Graukäse, and Georgian dambalkhacho. Lactic cheeses tend to be fresh cheeses like chêvre or cottage cheese, though there are some ripened or aged lactic cheeses like Valençay, Chaoruce, and Apricity, which develop a tantalizing cream line.

Apricity has a gently yeasty tang, reminiscent of cultured yogurt, tart white grapes, or natural, unfiltered white wine. It’s a perfect accompaniment on these cooler nights as fall begin to tinge the tree tops. If you’re a fan of some of our Italian softies like Il Nocciolo, La Tur, or Robiolina, or a Fromagophile who loves fresh chêvre, or you just like to sit down with a bowl of cottage cheese, Apricity is the cheese for you.

What's the best way to store cheese at home? Part One!

Ask ten different cheesemongers this question and you’re likely to get at least six different answers. Parchment paper. Foil. Tupperware. Saran wrap. Beeswax wrap! There’s a monger out there who swears by each of these methods, we guarantee it. At France 44, we typically recommend that our customers keep their cheese wrapped in the custom cheese paper we provide, but we like to back our advice up with more than just inherited practices. So this week we decided to put our lab coats on and conduct a good, old-fashioned cheese study.

The first matter at hand was choosing an appropriate test subject. Cheeses at either end of the texture spectrum tend to do best in the fridge, somewhat counterintuitively. As such, we chose Chebris, a lovely semi-firm sheep & goat’s milk tomme with just enough moisture and pliability to really show maltreatment from the harsh environment of the fridge.

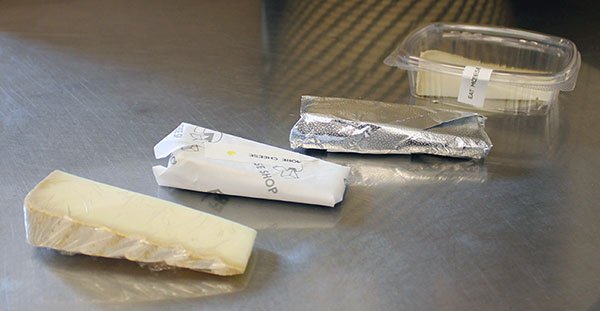
  1. Control: Cheese Paper

    We already know that cheese paper keeps cheese reasonably fresh in the fridge. Worst case, every other sample tastes terrible and we learn that our tried and true method is the classic for a reason.

  2. Foil

    This is a tip we learned from the late, great Anne Saxelby. Foil is flavorless, air-tight, and has the added benefit of blocking out light. Wrap as you would with cheese paper.

  3. Tupperware

    Sealing your cheese in a small Tupperware container allows the cheese to breath, while blocking out the drying, cool air of your refrigerator.

  4. Saran wrap

    Most mongers agree that saran wrap is the worst way to store cheese. You may point out: but you guys store your cheese in saran wrap at the shop?! It’s true, most cheese shops use cling wrap to display cheese, but it requires constant upkeep to prevent off flavors from taking hold. Saran wrap does not allow cheese to breath, trapping moisture near the surface which can lead to mold. It may look nice at first, but we don’t recommend this method for storage.

We popped our four test subjects into the chaotic France 44 Wine & Spirits employee refrigerator for a true replication of the home environment. Taco Bell leftovers? Present. Fish curry? Oh, yeah. We’ll come back in a week to see which storage methods sealed out these nefarious odors, and which, tragically, did not.

Cook Like A Cheesemonger: Tomato Galette

It might feel like summer is nearly over, but we’re still knees deep into the end of Minnesota vegetable season. Tomatoes are particularly special to me. I grew up eating those beauties right off the vine, still hot under the summer sun, while weeding, and probably (definitely) complaining, throughout all my childhood. It’s always a refreshing reminder when you grow your own food what kind of time, sweat, and labor goes into what we casually consume everyday. 

We usually had luscious, rustic seasonal salads every night from our garden. The end of summertime always tasted exceptionally magical. Walking out through the rows to cut some fresh basil or thyme to finish something for my Mother was always my favorite. 

This week, I wanted to utilize some end heirloom tomatoes I needed to eat before it was too late. I made a simple galette with goat cheese (although any cheese would do) finished with olive oil and herbs. Summer is a state of mind, friends. 

Ingredients: 

1 sheet of store bought puff pastry

1/2 cup sofrito or tomato sauce

3-4 heirloom tomatoes

3 oz Chèvre 

1 egg + 1 tbsp water (egg wash)

Fresh basil, thyme, oregano (or whatever herbs you’d like!) 

Olive Oil to finish 

Directions:

  1. Thaw your puff pastry (if frozen)

  2. Slice your tomatoes thinly, place on a tea towel and salt them, to remove excess water. Let sit for 15 minutes. Blot with another towel if needed, no one wants a soggy crust!

  3. Spread your Sofrito onto the center of your puff pastry, leaving an inch and half border. Crumble half of the goat cheese on top.

  4. Take your tomatoes and shingle them across the galette, and cover with more goat cheese.

  5. Beat an egg with some water, brush crust.

  6. Bake on a sheet tray with parchment until golden brown at 350 for about 15 minutes.

  7. Cover with fresh herbs of your choosing and a drizzle of olive oil. Enjoy!

La Cabezuela


La Cabezuela Tradicional Semicurado

by Austin Coe Butler

Juan Luis Royeula and Yolanda Campos Gaspar needed a change. The couple was doing well in their respective careers in communications and journalism, and Spain in the 80s and 90s was marked with a certain optimism after Franco’s death opened the country economically and culturally, but the two were dissatisfied. Juan Luis, uncertain, searching for his life’s passion, took a cheesemaking workshop on a whim, and in an instant he recognized his life’s passion. Juan Luis and Yolando quit their jobs, and in the process of making their passion their profession, they not only found themselves, but brought a local breed of goat from the brink of extinction, revived a failing, rural dairy, and preserved a rare, traditional Spanish cheese.

First, the Royuela-Campos family had to find a dairy to make cheese. In the small, rural town of Fresnedillas de la Oliva, which Juan Luis describes as “close to everywhere and far from anywhere,” they found the ailing Quesos La Cabezuela. Quesos La Cabezuela was a small, family run quesería specializing in goat’s milk cheeses that had fallen on hard times. It was on the brink of foreclosure when Juan Luis and Yolanda found it. Fresnedillas de la Oliva is on the western border of the Madrid region, and Quesos La Cabezuela is a tight, rustic operation. All of Juan Luis’s cheese making, aging, and selling happen within just a few footsteps. But that was all the space Juan Luis and Yolanda needed.

Next, the goats. Juan Luis learned of the Guadarrama goat that lives in the sierras, or mountains, surrounding Madrid, and are found nowhere else in the world. These elegant goats, streaked black and white with thick tufts of hair, are hardy yet graceful on the rocky terrain of the dehesa landscape, where they graze on pastures of thyme, heather, and grasses studded with acorns, imbuing their milk, and the cheese, with the region’s unique terroir. They easily endure the cold and rainy climate of the Guadarrama. Despite their hardiness, the Guadarrama were on the brink of extinction. They are not a meat breed, and they produce very little milk—whereas most goats produce between 3 to 4 liters of milk per day, the Guadarrama produces a mere 2 liters. For these reasons, the goats were rarely bred. In the mid-90s though, thanks to an association of farmers and cheesemakers like Juan Luis, the Guadarrama goats have been brought back from the brink of extinction. Juan Luis fell in love with these gregarious creatures and decided to make all of his cheeses exclusively from their milk. La Cabezuela works only with shepherds who have 100% Guadarrama goats. Despite these conservation measures though, there are still only 10,000 at present.

At last, there is the cheese. La Cabezuela Tradicional is remarkable for many reasons, but there are two features that are especially unique. First, it is maybe the only historically Spanish soft-ripened goat cheese. Other Spanish soft-ripened or bloomy-rinded cheeses like Veigadarte or Cana di Cabra were imported from France in the immediate post-Franco years. Few traditional Spanish cheeses survived the Franco years, with the functional ban on artisanal cheese production. The recipe for this cheese dates back to 1750, when it was a family farm cheese, and was kept alive by only a few cheesemakers through those dark decades of repression.

What’s equally unique is that La Cabezuela Tradicional Semicurado is really old for a bloomy rind cheese. Spanish cheeses labeled semicurado, or “semi-cured,” are aged between four to six months, and curado cheeses are anything past this. Manchego and Mahón, those firmer, more well-known cheeses are often aged at these profiles, but four to six months is a long time for a soft, bloomy rinded cheese! For context, think of having a piece of brie, camembert, or a Chabichou for six months. It would be pretty crusty and unpalatable. Instead, La Cabezuela Tradicional is able to retain moisture and its soft bloomy rind while developing flavors often found in older cheeses. It’s able to mature for this long because of its larger size and brining. Once the cheese is removed from the brine, it is delicately hand salted and allowed to mature for two months, creating an ideal environment for Penicilium and Geotrichum molds to bloom, binding the cheese together, and developing delicate white mushroom flavors. Some of our wheels of La Cabezuela Tradicional have a really unique cadmium orange mold called Sporendonema casei, which is only found on cheese and in cheese caves. While orange mold may instill fear in some, this mold is beneficial and is actually considered a desirable trait by cheesemakers, including Juan Luis, and cheese connoisseurs as an indicator of superior flavor. Cheeses with this mold often have a complex nutty and mushroomy flavor.

Eating La Cabezuela Tradicional is kind of like eating three cheeses in one. The delicate mushroomy, brassicaceous rind is reminiscent of a farmhouse brie, while the cream line has a malty, buttery flavor that gives way at last to a sherbert-like center that is bright, tangy, and herbaceous. La Cabezuela Tradicional Semicurado is many lofty things: a cultural and gastronomic expression of a tradition in a modern and sustainable way; the discovery of a life’s passion. It’s also simply a phenomenal cheese.

Ask a Cheesemonger: Does cheese go bad?

The answer, of course, is yes… and no. And probably not in the way that you think. Let us explain.

First, a bit of friendly mongerly advice. The best way to enjoy delicious cheese is to buy only as much cheese as you can consume in a week, no longer. Cheese will never taste better than when it’s freshly cut off the wheel. If you’re reading this, hopefully you patronize one of our cut-to-order cheese shops; our mongers would be delighted to cut you an appropriate amount of cheese, no matter how big or small. That said, we know life happens and sometimes things kick around in the fridge longer than we’d like. Let us help you triage some hypothetical cheese-mergencies.  

We’re going to talk about the ‘m’ word. We’re talking, naturally, about mold. If you’ve ever found a long-forgotten piece of cheddar in the back of your crisper, only to unwrap it and discover a thick pashmina of blue growth, this one’s for you.

We’re guessing that you quickly jettisoned that piece of cheese straight into the bin. We’ve all done it. But that little piece of cheese might not be beyond saving. Surface mold like the kind that grows on cheese or bread is unpalatable, but not harmful. Take a knife and cut a few millimeters off of each moldy surface. Now give the cheese a taste. You may be surprised by what you find. If that didn’t do the trick, the problem probably lies deeper, literally.

Firm cheese (think cheddar, Alpines, goudas) absorbs off-flavors in the fridge (which, incidentally, represents a far greater threat to cheese health than mold), flavors that work their way in from the surface down. At any decent cheese shop, mongers practice regular maintenance by scraping away the aged surface of open wedges. Sometimes this includes mold, which grows naturally from ambient spores and truly can’t be prevented. Your cheese represents a plush king size bed to those spores, which will happily make their home there given time. It’s unsightly, but it doesn’t have to be scary because—and allow us to let you in on a little secret—cheese is mold. That rind on your brie? Mold. The flavor in your favorite blue? Mold. The white patina on the rind of an aged Alpine? Ok, that one’s a yeast but you get the point! Mold: it’s what’s for dinner.

A wedge of any firm cheese you may purchase will never go bad, but it will lose its flavor with time, or worse, end up tasting like the smoked salmon you have next to it in the fridge. Our softer cheese friends, however, have the potential to get a little funkier. Soft cheeses ripen from the outside in; you may notice that their center remains firm and fudgy while the outer layer becomes gooey. This creates some wonderful textures, but it also means that the rind of such cheeses is the first part to age.

As the proteins in cheese break down, the nitrogen within is released in the form of ammonia. (Walking through a cheese-aging facility is an eye-watering experience.) You may unwrap a Camembert to be hit with a wave of chemical aroma—this is likely an indiction that your cheese is past prime. Again, it won’t be harmful to you, but eating it would be a supremely unpleasant experience with a bitter aftertaste. In milder cases, you may choose to cut off the top rind and eat the paste within, which tends to retain flavor better. Orange spotting, fluffy growths, or blue spots on these cheese rinds are strains of mold or yeast and can be consumed, or scraped away with the tip of a knife. Funkier barnyard aromas tend to be desirable in washed rind cheeses (Epoisses, Langres, Oma) and aren’t of concern.

Hopefully you’ll walk away from this post feeling a little more comfortable eating and caring for cheese. Wedges of firm cheese will last quite a while well-cared for in your fridge, but their flavor will naturally degrade with time. Softer cheeses, especially those in breathable packaging, are designed to age over a matter of weeks; depending on when in the cheeses’s life-cycle you pick it up, you may be able to keep it for up to a month. In either case, checking in on your cheese periodically is a good idea. Your nose is your best friend when it comes to cheese. If your nose tells you “nuh uh, no,” trust it!

Next week we’ll be covering the best ways to store cheese in your fridge at home because ultimately, happy cheese is the best cheese.

Cook Like A Cheesemonger: Pronto Pups

 In Minnesota, Pronto Pups and corn dogs have been pitted against each other for at least fifty years— and their supporters are resolute in the distinction between the two. Pups are made with pancake batter and corn dogs use cornbread batter. 

I haven’t personally met a corn dog I didn’t like, nonetheless I prefer a “pronto pup.” The light and fluffy batter surround the perfectly cooked hot dog with a slight sweetness and a subtle crisp.  No one can resist this amazing flavor combination! 

If you can’t make it to the fair this year, don’t worry. You can achieve all the savory satisfaction at home! I’m using my current favorite pancake mix from Hayden Mills for my batter.  This pancake mix features stone milled White Sonora, a sweet buttery grain that is the oldest wheat variety in North America. Don’t be intimidated by deep frying. It’s always worth it, am I right?! 

Ingredients:

Hayden Mills White Sonora pancake mix (one box)

1.5 cups of melted butter 

1 pk. France44 house-made hot dogs

Wooden grilling/kebab skewers

Canola Oil for frying
Large heavy bottomed pan

Candy Thermometer

Condiments of your choice! (Mustard is non-negotiable here, folks)

Directions: 
1. Make the WHOLE box of pancake mix in a large bowl or in your blender, according to the package instructions (you only have to add water!)

2. Skewer each hot dog with your wooden sticks and place them neatly on a cutting board. 

3.  Now, turning to your pan. I think a dutch oven works great, but you can use a deep skillet. You will want to make sure that it is deep enough to add a few inches of oil.  Pour enough oil into the pan so that it will adequately cover an entire hot dog.  Heat that oil up to 365°F. I will put a candy thermometer right into the oil and leave it there so I can monitor the oil temperature.  You really want to regulate it and keep it as close to 365°F as possible. If the oil gets too hot, your dogs will burn on the outside but not be cooked through on the inside. And, be sure to check the temperature of the oil after each hot dog or two has been fried; the oil tends to cool down a bit after each batch.

4. Dip each dog fully into the batter, multiple times or until you have a very thick coating. Once your oil is hot, carefully lay each dog away from you, into the hot oil. Fry one at a time, until golden, turning if needed. 

Carefully use a tongs to remove each dog, and place on a sheet tray lined with paper towels to absorb any extra oil. 

Slather those puppies in whatever suits your fancy! Mustard! Ketchup! MAYO! 

Or all three. Live your best life! 

L'amuse Signature Gouda

by Austin Coe Butler

No doubt you’ve seen the stack of dark orange wheels on our counter, simply standing at room temperature, likely with the cross-section of a half wheel or wedge spangled with crystals. Customers seem to gravitate towards it, mesmerized. This enchanting tower of cheese is built from wheels of L’amuse Signature 2-Year Gouda, and there is no gouda crunchier, or more crystally that L’amuse Signature in our case. Its rich, butterscotch, burnt sugar sweetness and creamy paste studded with crystals have us refer to it lovingly as “cheese candy.”

But what are those craveable, crunchy crystals? In cheese, crystals are typically either calcium lactate or tyrosine.

Calcium lactate is formed as cheese ages and lactic acid comes into contact with the latent calcium in cheese. It’s most often found in aged cheddars, where it is seen on the surface, and doesn’t concern us at the present moment. Tyrosine is an amino acid found in many well-aged cheeses like Alpines, goudas, cheddars, and Grana style cheeses. It is the tell-tale sign of the bacteria Lactobacillus helveticus hard at work. L. helveticus is highly proteolytic, meaning it likes to break down proteins into amino acids like tyrosine. Proteolysis is central to cheese making, as it happens primarily when rennet is added to liquid milk causing casein proteins to break and unravel, and thus coagulating milk into curd, the foundation of cheese. Proteolysis can also happen secondarily, though, through the microbial metabolism of bacteria, yeast, and mold endemic or introduced to the milk, and as the microbes continue to break down proteins, deposits of tyrosine begin to form. (We could also call this by another name: fermentation, as cheese is a living, breathing food.) Calcium lactate and tyrosine are often erroneously called “flavor crystals” or “salt crystals,” but neither calcium lactate nor tyrosine have any flavor, and instead they are great indicators of flavors.

Why call them that then? Simply, marketing. But their presence almost always means you’re about to crunch on a piece of cheese that has had time to concentrate big, complex flavors.

L’amuse Signature 2-Year Gouda has all of these big, complex flavors like aged soy sauce, roasted hazelnuts, or brown butter as the result of a daring, unorthodox process that pays off big. Fromagerie L’amuse is Amsterdam’s premier cheese shop run by Betty and Martin Koster and they provide many of our favorite goudas like Wilde Weide and the goat’s milk Brabander. Betty and Martin buy young wheels of gouda from the Cono Cheesemakers, best known for Beemster, and then their team of opeleggers, the Dutch word for an affineur, or cheese ager, “finish” or mature the cheeses at their own facility by aging them in ideal conditions, and here that big risk, high reward comes in.

What distinguishes L’amuse Signature 2-year gouda is the temperature at which the wheels are aged. Most goudas are aged at a fairly cool temperature, between 45–50ºF, and the Koster’s age most of their goudas at this temperature. But for L’amuse Signature they age the wheels at a warmer temperature, much closer to Parmigiano Reggiano’s maturing temperature than to other goudas, around 55–60ºF. Higher temperature means more microbial activity, more fermentation, more proteolysis, more tyrosine crystals, and more of those big, sweet flavors. The risk is that if there’s anything amiss with the cheese, or if there are any “off” flavors to begin with, they will be accelerated and exacerbated, and the investment of two-years into that wheel of cheese while taking up space and not paying rent was all for naught.

Signature 2-year is phenomenal for all occasions, but it is especially at home for dessert. Served alongside chocolate and espresso at the end of a meal, the bitterness rounds and complements the sweetness. There’s a complex flavor like deeply browned, tantalizingly burnt meat at play in L’amuse Signature that is right at home with a strong, dark Dutch beer or snifter of peaty whiskey that make for an unforgettable experience after dinner pairing. Absolutely inundated with tomatoes during late summer? Try this recipe for “Snow with L’amuse Signature,” a tart made with tomatoes seasoned in balsamic vinegar and black pepper on crisp phyllo dough topped with dusting of L’amuse Signature and enjoy alongside a glass of crystal clear beef-stock. Or just eat it on its own. When was the last time you paired a Butterfinger?

Order Online