

Building a beautiful cheese board is a simple and elegant way to impress your guests during the holidays. Boards can range from bare-bones to over-the-top, but the most important thing to remember is that no matter how you serve it, delicious cheese makes people happy. Follow these guidelines for cheese board perfection:
Start with three to five hunks of cheese. To make sure you have a nice variety, go for different textures, different milk types, and different countries of origin. Anyone behind the cheese counter can help you pick a great selection. It’s always good to taste cheese before you buy! There are some spectacular options in our case right now only available during the holidays. Check out Rush Creek Reserve, Black Betty gouda, and Comte Sagesse!
Serve the cheese at room temperature. This is one of the most important steps. Cheese straight from the refrigerator doesn’t reflect its ideal flavor or texture. Make sure to leave it out on the counter for 3-4 hours at least.
Keep the extras simple. Dried fruit, nuts, olives, honey, and fruit preserves are all perfect, but keep in mind that really good cheese doesn’t need much of anything to shine. Place one or two around the board or, for a more extravagant look, fill in all the spaces between cheese. Some great options: Ames Farm honeycomb, Marcona almonds, Inna jam.
Crusty bread is the perfect vessel. We sell awesome rustic bread from Baker’s Field in Northeast Minneapolis, as well as more traditional baguettes. Simple crackers are also a good option.
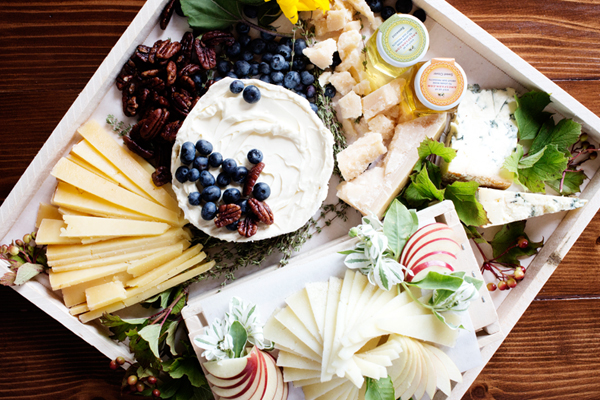
Follow these guidelines and you’ll be well on your way to a delicious and beautiful cheese tray! If you need any more advice, keep in mind that any cheesemongers behind the counter would love to help out. You can find more inspiration on the @ThatCheesePlate instagram or in one of our favorite books, DiBruno Bros. House of Cheese.