Cook Like a Cheesemonger: Panzanella Pasta Salad

By Austin Coe Butler

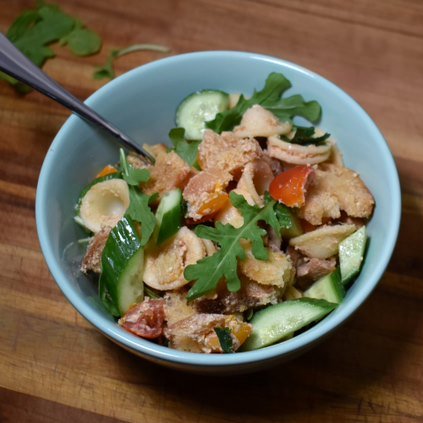
This hybrid between a creamy pasta salad and a panzanella, a bread and tomato salad with a tangy vinaigrette, is the perfect dish to bring to your next cookout, picnic, potluck, or block party. It’s bright, creamy, tangy, refreshing, and, best of all, will guarantee you leave with a nice empty bowl that’s easy to clean. It’s best made in advance, great at room temperature, easy to scale up, and simple to modify for the occasion. 

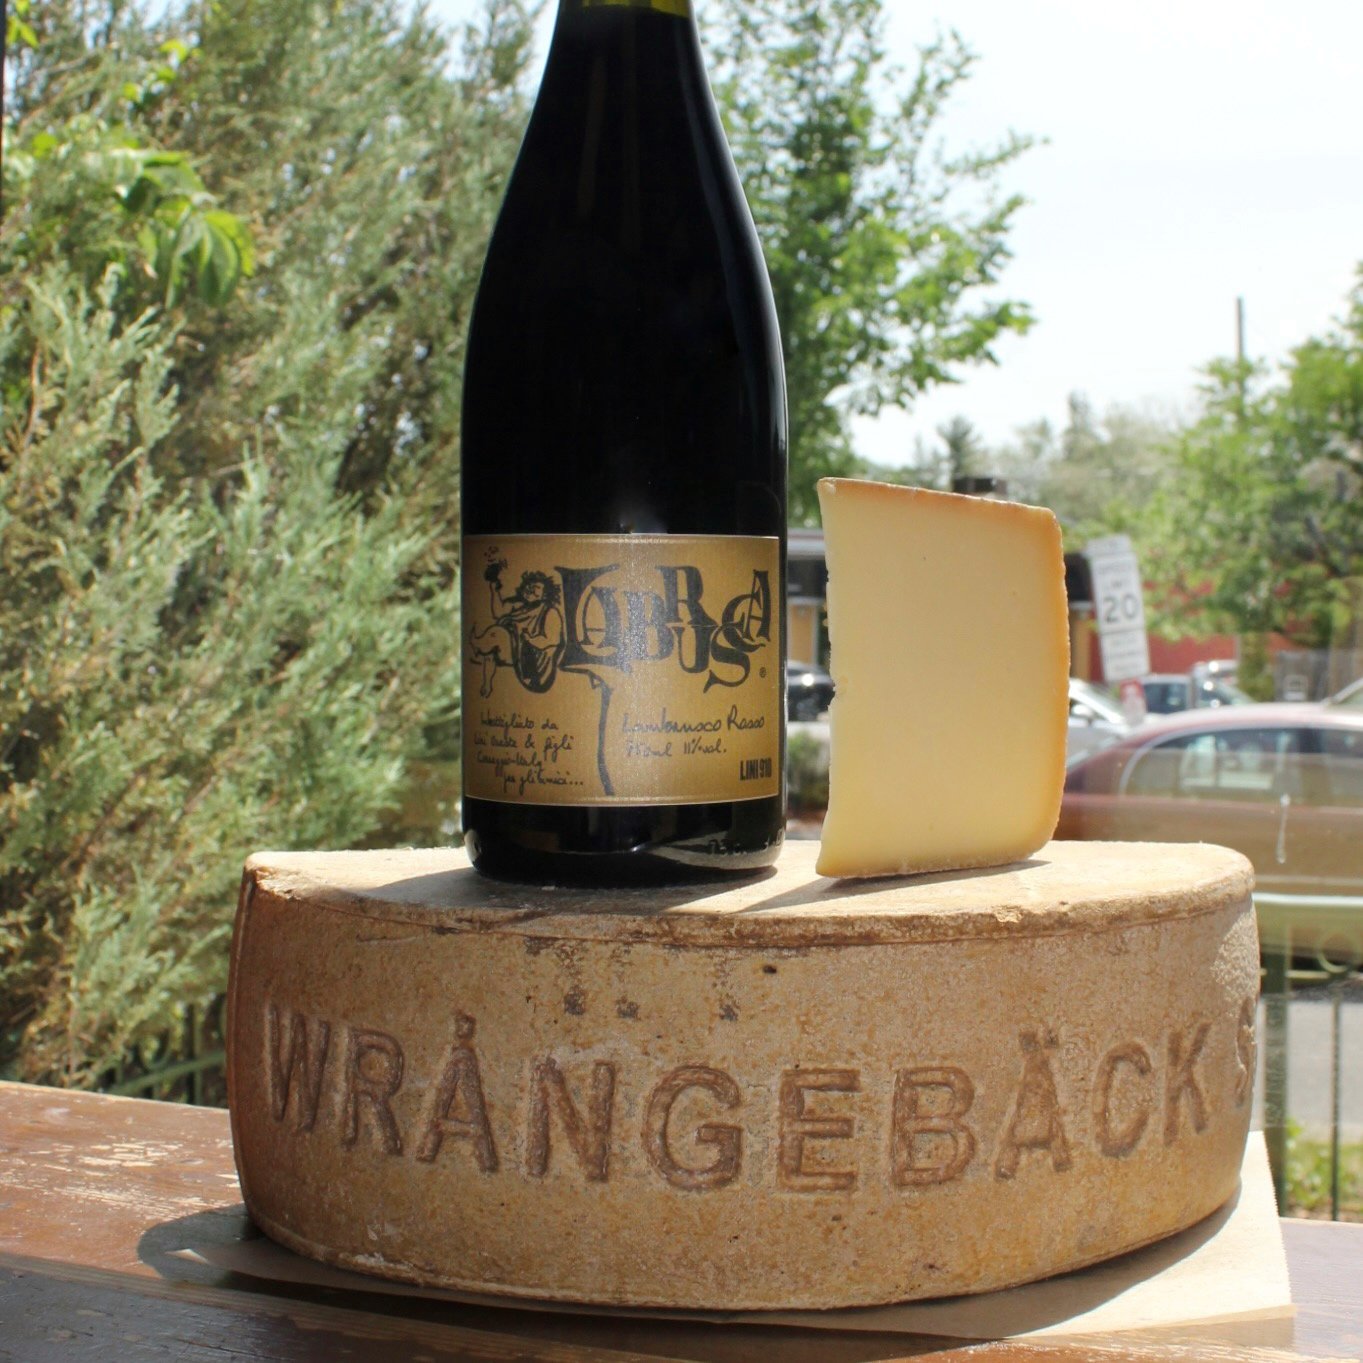
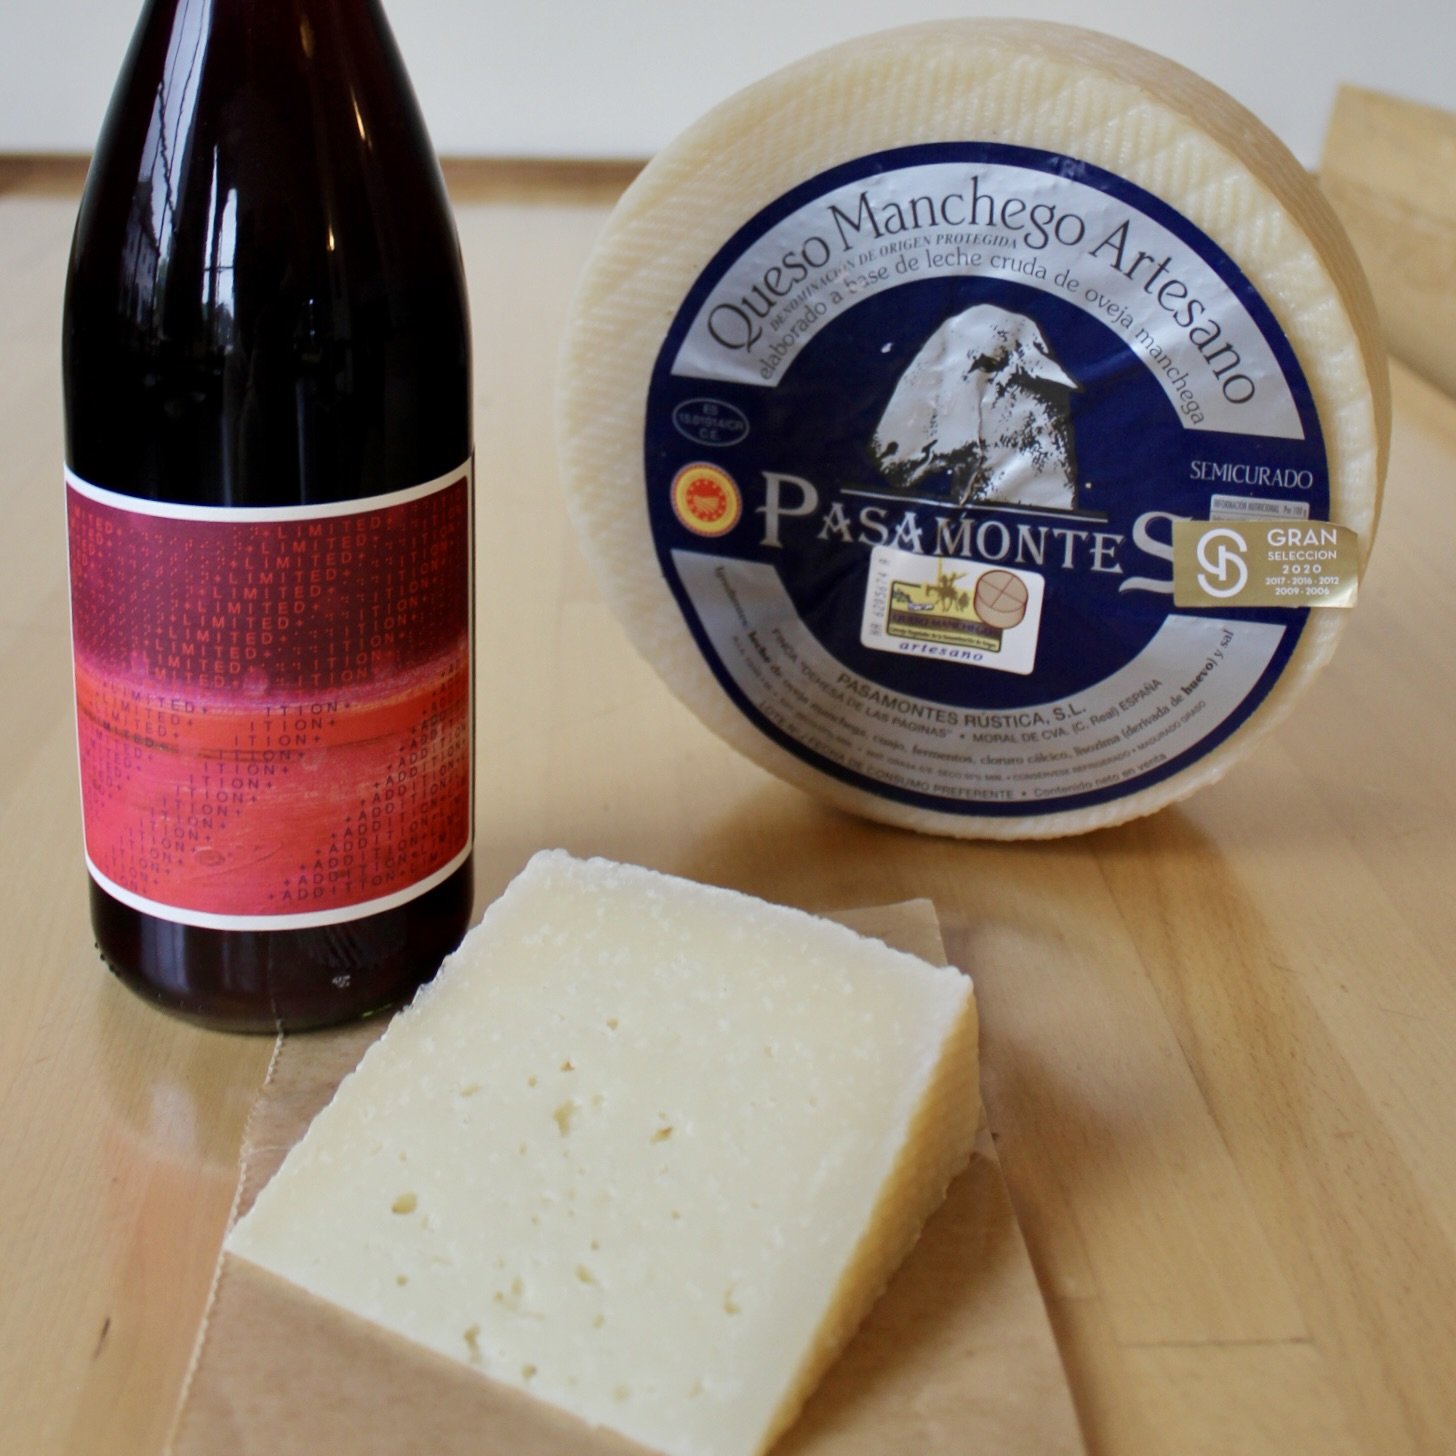
I want to thank the customer that shared with me the inspiration for this recipe. (You know who you are!) Last weekend we featured our custom washed Grillin’ Cheese from Blakesville Creamery that is washed in Dampfwerk’s Barrel Aged Gin. It’s a Croatian inspired cheese that is essentially a puck of chèvre wrapped in grape leaves that have been soaked in a spirit. This cheese is a favorite of this customer’s daughters, and it’s always a joy when I see them picking it up. While we were talking at the cheese counter he mentioned that he had substituted the Blakesville Grillin’ Cheese for halloumi in a New York Times recipe by Yossey Arefi for orecchiette salad with halloumi croutons. In addition, he had removed the cilantro, red onions, and arugula, and added in bread croutons. The judgment of his daughters? This version was even better! And it was even better the next day! This is how great recipes are born.

1 pt cherry tomatoes, quartered

4 tablespoons extra virgin olive oil

2 tablespoons red wine vinegar like La Guinelle Vinaigre de Banyuls

Kosher salt

Black pepper 

8 ounces orecchiette or other small pasta

1 Blakesville X Dampfwerk Grillin’ Cheese

1 bag France 44 garlic crostini

3 Persian cucumbers or 1 English cucumber deseeded

2 cups arugula (optional)

½ cup chopped cilantro or parsley

½ cup chopped mint

¼ finely chopped red onion (optional)

  1. Add the tomatoes, 2 tablespoons of the olive oil, red wine vinegar, salt, and pepper in a small bowl and leave them to marinate while you prepare the rest of your ingredients.

  2. Bring a large pot of salted water to a boil.

  3. Grill or pan fry the cheese. Grilling the cheese is a great option because it imparts smoke to the cheese, otherwise, pan frying it works great, too. You’re looking to heat the cheese through and soften it. I did this directly over my gas burner on low heat, flipping it from time to time, for about 5 minutes, just to get some char. Once soft, remove it from the grape leaves, add it to a large bowl, and mash it into a paste.

  4.  Cook the pasta. It’s especially important with pasta salad to cook the pasta al dente, usually about 2 minutes short of the manufacturer's recommended cook time. Often the pasta in pasta salads has been obliterated—it’s soft, mushy, slimy, and disintegrates. Al dente pasta is also “thirsty” and will soak up the vinaigrette. Once cooked, strain the pasta and add it to the large bowl along with the tomato vinaigrette. Stir to combine the pasta, tomatoes, and cheese.

  5. Add all the remaining ingredients to the large bowl and stir to combine. The mixture will seem a little stiff, so feel free to add more olive oil and vinegar, but give it time to rest while the pasta and crostini absorb the liquid and soften. What’s great about the addition of the crostini is that since they are toasted, they don’t turn to mush the way fresh or even stale bread does when it soaks up liquid. Instead, it retains its shape and a bit of spring, providing a nice chew and even a bit of crunch the next day. 

  6. While this pasta salad will be ready to go as soon as you make it, I suggest letting it sit overnight. If you would like to add the arugula, add that on the day of serving so it doesn’t wilt along with a few more freshly chopped herbs and a scattering of crushed crostini for crunch.

Meet your Marketer: Anna

What do you do here, and how’d you find your way to France 44?

Before working at France 44, I worked as a bread baker and miller. I spent the last 3 ½ years at Baker’s Field Flour and Bread in Northeast MPLS. I was ready for a change of pace and to try something new, but knew it had to be in the world of food. I wanted to understand a new side of the food industry: I had been working in wholesale for so long, and wanted to learn about retail. I had been doing some of the marketing at the bakery, and really enjoyed it, so I thought I’d apply for the Marketing Coordinator position at France 44, and here we are! Now, I work on the marketing teams for the Cheese Shop, Liquor Store, Events, and our St. Paul stores, from social media to weekly emails to photographing products and events, and I’m loving it! It’s really so special to get to work on this team of passionate and deeply knowledgeable folks.

Fav France 44 discovery so far?

I love the Blakesville Linedeline. I love the tang of a goat cheese, and this one somehow manages to hold the texture of a classic chèvre in the middle, but a silky creamy brie like texture on the outside. And the line of ash makes it so beautiful!

Also a very big fan of the smoked paprika parmesan dip.

Fav Sando in the shop?

Prosciutto di Parma. It’s simple & perfect.

How do you spend time outside of work?

Now that it’s nearly summer, you can probably find me at my community garden plot about 99% of the time I’m not at France 44. Take a walk around a community garden next time you come across one, they’re the happiest places on earth.

Go-to Twin Cities Eats?

Quang will always be my #1. But I’m also quite obsessed with Boludo’s empanadas and the chilaquiles at Hola Arepa. I also recently discovered the corn pancake at Maria’s Cafe and it was pretty life-changing.

The Pairing: Wrangebäck + Lini Lambrusco

by Sophia Stern

Why we love the cheese 

Wrångebäck is a true fan favorite and the only cheese in our case to come from Sweden. This alpine-esque cheese features an addictively creamy texture and a surprisingly zippy flavor bursting with umami. Not only is Wrångebäck the perfect cheese for snacking or melting (burger season, anyone?), but it’s also Sweden’s most historic cheese and the folks at Almnäs Bruk are keeping its history alive.  

Why we love the cheesemakers  

Almnäs Bruk is a thriving farm and historic estate with extraordinary respect for the land. Their land is maintained with care for the species that call the farm home. Grasses are allowed to grow tall so birds can nest and thrive. Cows eat feed made from the pasture they graze on and enjoy changing landscapes, from open fields to ancient forests. The cattle breeds are varied and unique, some rare and saved from extinction by the Almnäs Bruk team. When it comes to Wrångebäck, the cheesemakers preserve their hard-won terroir by thermalizing the milk, instead of pasteurizing, saving the microorganisms that make Wrångebäck so unique and delicious. To hear the makers themselves talk about the magic of cheesemaking in West Sweden, join our class next week!

Why we love the wine 

I could (and do) drink Lambrusco all year long, but it is especially excellent in the summer. Lini Lambrusco is delightfully cheerful, with notes of blueberries, cherries, and balsamic. This sparkling red, chilled and crisp in flavor, gives you enough complexity while keeping you refreshed in the Minnesota summer sun.  

Why we love the pairing 

Wrångebäck is a flavorful, rich cheese so any pairing needs depth and body to stand up to this Swedish gem. Lini Lambrusco has both, with the lightly frothy bubbles balancing Wrångebäck’s melt-in-your-mouth texture, without wiping the flavors away. In fact, the wine’s notes of blueberry jam and balsamic vinegar highlight and balance the savory, salty flavor of the cheese.  

What else you should do with it  

Melt it! Mac and cheese, grilled cheese sandos, or better yet use Wrångebäck on your cheeseburgers. The beef-broth flavor in the cheese complements the flavors of a classic burger, and Lambrusco is the perfect wine to enjoy both while you grill and while you eat.  

Cook Like a Monger: Risotto

by Anna Glassman-Kaufman

We’re going back to the basics this week with a classic risotto recipe. Don’t let risotto intimidate you. It may be a bit of a labor intensive process, but it never disappoints. Master this basic recipe and get ready to customize with seasonal produce and herbs, new stocks/broths, and unique cheeses.

Serves 2-3

Ingredients:  

2 tablespoons extra virgin olive oil 

¼ cup shallot, minced

1-2 cloves garlic, minced  

1 cups carnaroli (or arborio) rice  

3 cups chicken stock  

½ cup white wine, we recommend chardonnay  

½ cup Parmigiano-Reggiano, freshly grated, plus extra for garnish 

1 tablespoon unsalted butter  

Salt and pepper to taste 


Method 

  1. Bring chicken stock to a simmer in a medium saucepan. 

  2. Meanwhile, in a large heavy bottomed pot, sauté shallot and garlic in olive oil on low/medium heat until soft, but not browned. Season with salt and pepper.  

  3. Add rice and stir with a wooden spoon, until the rice is evenly coated with olive oil. Continue to stir for one minute until the rice has a nutty aroma.  

  4. Add the white wine and stir constantly until it is all absorbed into the rice.  

  5. Add about ½ cup of simmering stock and stir until nearly all of the liquid is absorbed. Then, add another ½ cup of stock and stir. Continue this process until all the stock is added (15-20 min) and risotto is al dente, creamy, and a little bit soupy.  

  6. Turn off heat and stir in grated Parmigiano-Reggiano and butter.  

  7. Garnish with a drizzle of extra virgin olive oil, more grated Parmigiano-Reggiano, and freshly cracked black pepper. Serve immediately.  

Cook Like a Monger: Berry Ricotta Cake

by Anna Glassman-Kaufman

When I was 18, I took a weekend trip to Portland, Maine, where I was introduced to a bakery called Standard Baking Company. To me, the bakery was perfect. They sold breads and pastries in a simple storefront, somehow perfectly toeing the line between delicate and rustic. That visit, and many more during my four years living in Boston, sent me down a path, dedicating my career to world of food & beverage, which started in baking. And on that first visit, I picked up a copy of their cookbook which contained the recipe that inspired the one I’ve shared with you below: the Berry Ricotta Cake.

A few years later, I found myself volunteering on a goat farm in Italy, with more ricotta than we knew what to do with. Ricotta is a byproduct of cheesemaking; made from whey, so with every batch of cheese we made, we made a batch of ricotta too. I started making this cake for my farm hosts - filling it with strawberries from their garden, sour plums from the tree outside their house, anything I could get my hands on. We’d carry it up the mountains and after a hard day’s work shepherding & milking goats, it always hit the spot. It’s a dependable recipe, and truly versatile.

This berry ricotta cake is the perfect example of a simple recipe that lets the quality ingredients shine. Ricotta has a magical quality in cake, giving the cake a moist and almost custardy texture. Adding ricotta to your batter ensures that your cake won’t dry out, whether kept in the fridge or on the counter. And it lets the cake stand alone, with no need for frosting. This is truly a snacking cake, made to pair with coffee or tea.

This recipe is written for a standard loaf pan, but feel free to adapt it to your needs. I’ve made this as a loaf, a bundt (as in this picture), a round cake, cupcakes. As long as the batter only fills about ⅔ of the pan you’re using, you’re good to go. You can add whatever citrus, berries, or other fruit you have on hand. And I promise you, once you’ve baked a cake with ricotta, you won’t go back.

Ingredients:

  • 10 tbsp salted butter, softened  

  • 1 ¼ cup sugar  

  • 10 oz Calabro Whole Milk Ricotta  

  • 3 medium eggs  

  • 1 tbsp lemon zest  

  • 1 ½ tsp pure vanilla extract  

  • 1 ½ cups all-purpose flour  

  • 2 tsp baking powder 

  • ½ tsp salt  

  • 1 ½ cups fresh berries (whole if small or cut into about ½ inch pieces if large) 

 Method:

  1. Preheat oven to 350°F. 

  2. Line a 9x5 inch loaf pan with parchment paper, or grease and flour all sides.  

  3. Using a hand mixer or stand mixer with paddle attachment, cream butter and sugar until light and fluffy. Scrape bowl well.  

  4. Add ricotta and mix on low speed to combine.  

  5. Add one egg at a time, beating well and scraping between each addition. Then add lemon zest and vanilla extract.  

  6. Sift the dry ingredients together, and add in one addition, beating on a low speed until just combined.  

  7. Fold in berries by hand.  

  8. Pour into your loaf pan and bake for 55-60 minutes, rotating the pan halfway through the bake. The cake will be a rich brown color and a toothpick should come out clean from the center.  

  9. Let your cake cool completely, then turn out and slice to serve.  

(Real) American Cheese

By Austin Coe Butler

Did you know that May is American Cheese Month? No, we’re not celebrating that big block of orange stuff made by Kraft (which isn’t actually cheese), but real cheese made from curds and whey by artisans, families, and small producers! With the arrival of American Cheese Month along with the return of American Cheese Society's Judging and Competition to Minneapolis, I thought it would be worthwhile to write about how American cheese is unique and what the state of it is.

Prior to the arrival of European colonists, there was no cheese in the Americas. The mammals whose milk is best suited to make cheese—cows, sheep, goats, water buffalos, and yaks—were absent until the Columbian Exchange. Additionally, the indigenous populations, like the majority of the world’s population to this day, were lactose intolerant and had not developed the genetic mutation that allows some people to continue producing lactase, the enzyme responsible for breaking down the problematic milk sugar lactose after weaning. With the exception of llama milk, which was occasionally consumed by Andean cultures, no dairying traditions were present in the “New World.”

American cheese inherited its traditions from its historical patterns of immigration. The first cheeses in the Americas were made in Mexico by Spanish settlers. These fresh cheeses like queso fresco and queso Oaxaca were simple to make and could be consumed immediately. English pilgrims arriving in the Northeast brought with them the dairying traditions of butter and pressed, aged cheeses like Cheddar and Cheshire. Subsequent waves of immigration brought us Italian inspired cheeses like parmesan, German cheeses like Limburger,  and Mexican cheeses like Monterey, among others. 

America has been the source of many great innovations in cheese, but particularly in the production and aging of Cheddar. Owing to the hot, humid summers of the Northeast, British colonists found that their truckles of Cheddar and Cheshire would crack. They found that by wrapping or “bandaging” the cheeses in cloth—cheap, disposable, and readily available from the supply of cotton harvested by the enslaved on Southern plantations—helped limit the cracking, thus inventing the clothbound format that we often think of with English Cheddars, although they are very American. In the 19th and 20th century, petroleum products like paraffin wax and plastic vacuum bags created even better impermeable seals, allowing Cheddar to be aged for impossible timespans of twenty, thirty, or even forty years, opening up incredible new vistas of flavor. America was also home to the first cheese factory, a Cheddar factory in upstate New York founded in 1851 by Jesse Williams. Cheddar became a ubiquitous part of American life when it was included in welfare, eventually being enshrined in the American lexicon as slang for money. It was only in 2016 when Mozzarella, by way of our ravenous pizza consumption, usurped Cheddar as the most consumed cheese in America. 

American artisan cheese naturally has many of the qualities we like to associate our national identity. Unhinged by tradition and unbound by strict regulatory titles like PDOs or AOCs, American artisan cheese has an opened mindedness and freedom of expression when it comes to cheesemaking. You’ll see the rugged individualism so central to American mythology in the names of cheese; lacking the regional traditions of Europe like Roquefort, Parmigiano Reggiano, or Gruyère, you’ll find names like Pleasant Ridge Reserve, Midnight Moon, Humboldt Fog, or Pawlet. You’ll also find individual figures hailed as founders for the nascent farmhouse cheese industry like Judy Schad, Mary Keehan, and Laura Chenel of the “American goat ladies”, David and Cindy Major of Vermont Shepherd, or Marian Pollack and Marjorie Susman of the storied Orb Weaver Farm. 

While many American cheeses are inspired by European recipes and styles of cheese—much to the chagrin of European producers—American cheesemakers are able to use them as a point of departure. Take Pleasant Ridge Reserve for example, an Alpine cheese inspired by the tradition of European alpage, but made in Wisconsin, with cows bred for a postage stamp of pasture in Dodgeville to make milk that becomes cheese and, ultimately, an expression of American terroir. There are also some incredible experiments going on right now like the Cornerstone Project to create the first truly “American Cheese,” which we carry from Cato Corner.

America is the fastest growing market for artisan cheese in the world, and there’s good reason why the giants of European fromagerie greedily eye American producers, as the recent acquisitions of artisan doyennes Cyprus Grove and Cowgirl Creamery by the Swiss Emmi AG shows. In 2016 with the crowning of Rogue River Blue as the “World’s Best Cheese,” American cheese arrived on the global stage to the scandal of Europe. Like the dream pursued by so many here, American cheese is filled with limitless potential, in addition to incredible stories and flavors. To celebrate American cheese, we’re promoting cheese from all over the country, from Minnesota, Wisconsin, Iowa, to California, Vermont, Connecticut, and, heck, even Tennessee, with a 15% discount. Come to the shop to sample some American cheeses and discover what makes our cheeses so delicious and unique!


Want to more know and try some of the best cheeses America has to offer? Join us in our gorgeous new events space on June 20th for our class on American Artisan Cheese!

Thai Beef Salad

 
Bowl of Thai beef salad, featuring fresh vegetables and herbs & beef.
 

by Austin Coe Butler

This recipe is inspired by a Thai dish called Yum Nua, which quickly became a favorite in our house. As it relies on produce that can be grown well even in greenhouses like cucumbers and cherry tomatoes, this Thai beef salad is always satisfying whether it’s been grilled over charcoal on a summer’s day or pan seared on a winter’s night. 

The dressing makes this recipe sing. It’s similar to a Vietnamese nuoc cham, a tangy, salty sauce of lime juice, sugar, and fish sauce, but it has the addition of cilantro stems, garlic, and chilis for an herbaceous heat. Unlike parsley or oregano, cilantro stems have almost as much flavor in them as the leaves, and when cut finely or crushed, they’re delightful to eat and not stringy at all. Don’t be afraid of the fish sauce! While this may seem like an unfamiliar ingredient, think of it as a southeast Asian worcestershire sauce. It has a deeply satisfying salty and umami quality that compliments and accentuates meat, vegetables, and, a personal favorite of mine, mushrooms. You can find the Red Boat brand fish sauce in many coops and high-end grocery stores, or a variety of brands at your nearest Asian grocery store. I prefer the Squid brand (it doesn’t contain squid, it’s just called that!)

For the beef, you can use whatever cut you like, but I prefer using longer, thinner cuts like skirt, bavette, flank, or flat iron, all of which we readily carry in the meat case. These cuts benefit from a quick sear and cutting against the grain. If you don’t eat beef, you could substitute pork chops or chicken thighs to great success.

For the salad: 

1 lb. beef cut of your choice, but preferably longer, thinner cuts like skirt, bavette, flank, or flat iron. 

1 small red onion, sliced thinly

1 English cucumber, deseeded and sliced thinly on a bias

1 pint of cherry tomatoes, halved

Mixed greens

¼ c. cilantro leaves

¼ c. mint leaves

Crushed peanuts to garnish

For the dressing:

1 tbsp cilantro stems

1 to 2 cloves garlic

3 tbsp fish sauce

3 tbsp lime juice

2 Thai bird’s eye chilis

1 tbsp neutral oil

2 tsp sugar

Salt to taste

Directions

  1. At least 30 minutes before you plan to cook the steak, pull it from the refrigerator to temper it and season generously with salt.

  2. Prepare the dressing. Add the cilantro stems, garlic, Thai chilis, sugar, and just a pinch of salt to a mortar and pestle and work them into a paste. You can also use a food processor. Next, add the fish sauce, lime juice, and oil and stir to combine. Taste for seasoning and adjust accordingly. It should be balanced between the tart acidity of the limes, the salty umami of the fish sauce, and the herbaceous heat of the aromatics.

  3. Prepare the base of your salad. Halve the cucumber and remove the seeds with a spoon, then cut half moons at an angle. If you want to take the edge off the raw red onion, you can place it in a bowl of ice water for a few minutes. I like to lightly salt the tomatoes to draw some of the juices out and add them to the salad dressing, contributing some of their sweetness. Combine all the vegetables including the mixed greens, cilantro leaves, and mint in a large bowl.

  4. Over high heat, grill or pan sear the beef to your desired doneness. For medium rare, that’s about 4 minutes each side. Allow the beef to rest for ten minutes.

  5. Once rested, cut the beef into strips against the grain. This may involve first cutting the beef along the grain into shorter sections and then cutting against the grain. I like to cut the beef at a 45º for wide strips.

  6. Dress the salad to your liking, reserving a few spoonfuls of the dressing. You can either add the beef directly to the salad when you toss it, or you can serve it on top of the tossed salad.

  7. Garnish with more cilantro and mint leaves, the crushed peanuts, and a final, generous spoonful or two of the reserve dressing over the beef. This salad is great warm, room temperature, or cold, so serve it however you’d like!

Pasamontes 3-Month Manchego + Limited Addition Red Blend

by Sophia Stern

Why we love the cheese 

Pasamontes Manchego is a shining example of how exciting and delicious manchego can be. By keeping their sheep’s milk raw, Pasamontes Creamery ensures their cheese reflects the unique pastures of the Spanish La Mancha region their herds graze upon. Tangy, rich, and super craveable, Pasamontes 3-month Manchego is a versatile cheese that will please the cheese novices and the cheese experts alike.  

Why we love the wine 

This is a gorgeous red blend perfect for sunny, warmer days. Made by Master Winemaker Bree Stock, the Limited Addition Red Blend is made up of almost equal parts Trousseau, Gamay Noir, and Pinot Noir, all grown in the Willamette Valley. Fresh, funky, and super fun, this blend can be enjoyed chilled and should become a go to wine for warmer weather.  

Why we love the pairing 

Sheep’s milk is tricky to pair, but the Limited Addition Red Blend handles it beautifully. The tannins and body of the wine are gentle enough to enhance the subtle flavors of herbs in the cheese, while there’s enough acid to balance the buttery decadence of the Manchego. These two together are bright, festive, and super enjoyable.  

What else you should do with it  

It’s grilling season, baby! This pairing would be excellent with some well-spiced turkey burgers. Make your own patties with some F44 ground turkey, paprika, garlic powder, salt and pepper. Grill them up with shaved Manchego melted on top and enjoy with a bottle of the Limited Addition Red Blend. You’ll have an easy and delicious late-spring dinner.  

Cook Like a Monger: The Bánh Mì Burger

by Matt Gruber

Alright, let's talk bánh mì: a Vietnamese staple which dates back to the 1950's; a phenomenal sandwich on a short baguette, typically with some combination of pork, cilantro, cucumber, pickled carrots and daikon. You will see the French influence in certain variations as well, sometimes with a pâté or some form of mayonnaise.

It wasn't until after the Vietnam War that we began to see this sandwich more often in the US. Fast forward in time a bit and we start to see some new innovations in food happen. People start getting creative and combining food staples from around the world: one region’s cooking techniques with another’s cut of meat. Some of my favorite dishes are the culinary lovechild of two regions: gyro tacos, kimchi avocado toast, deep fried bok choy chaat. In 1988 the term "fusion cooking" was used in a speech given by Norman Van Aken (who has been called the Walt Whitman of American cuisine), coining the phrase we use today for such cuisine.

Here, I'm channeling one of the fusion godfathers, Wolfgang Puck, and transforming the bánh mì into a new summer staple... the bánh mì burger.

Ingredients:

1# Ground Pork (will make ~3 burgers)

Rose Street Bakery’s Japanese milk buns

Salt and Pepper to taste

1/4 cup cilantro, chopped

2-3 carrots, grated

1-2 baby cucumbers, sliced into coins

1 tsp ginger, minced

1 tsp garlic powder

1 1/2 tablespoon black garlic molasses

1/4 cup soy or ponzu sauce

1/2 red onion, sliced into moons

1 lime

1/4 cup white vinegar

 For the adventurous crowd, 1 jar of pork liver mousse

Directions:

In a bowl, combine juice of half lime, 1 tsp sugar, sliced onions, salt and pepper, 1/4 cup vinegar- set aside to quick pickle.

In a second bowl, mix your pork, garlic powder, ponzu/soy sauce, cilantro, black garlic molasses, then form into patties.

Preheat your cast iron or favorite heavy bottom pan on medium heat, place burgers in pan once preheated and cook for 4 1/2 - 5 minutes per side. Once cooked, pull off and let rest for 2-3 minutes, assemble burger with pickled veggies on top, garnish with cilantro if desired (and the pork liver mousse) and enjoy!

Cook like a Monger: Duck Confit Fried Rice

by Austin Coe Butler

Making fried rice is less about following a recipe and more about being in a state of mind. That is to say, it’s a great technique to have in your repertoire. In its ingredients and complexity, it can be dialed up or down from late night snack to date night main depending on the occasion or what’s in your fridge. You can use practically anything—carrots, frozen peas, corn, cabbage, rotisserie chicken, old steak, frozen shrimp—but to make it a meal I like to include two vegetables and a protein. For this recipe, I thought of a fabulous basil duck stir fry I had recently at Kahluna, and I had some pineapple laying around in the fridge. I added our house-made duck confit as an elegant yet easy and ready-cooked protein. 

Less is more when making fried rice. Too many ingredients, or too great a volume, and your fried rice will steam as opposed to pan fry and get that wok hei flavor, that inimitable subtle smoky, char that permeates a good restaurant-quality stir fry. In restaurants, chefs are using gas burners that resemble jet engines more than they do a kitchen stove, so the trick is to manage heat and volume. For that reason, I recommend cooking this dish in two batches. If you have an induction stove top or are using a flat bottomed skillet, you can still make an exceptional stir fry by following a few tricks.

First, make sure all your mise en place is done before you start. From start to finish, fried rice should take less than five minutes to cook. Cut small, uniform pieces of the ingredients so they cook quickly and evenly. Second, and most importantly, use day old rice. Using day old rice is the biggest upgrade to your fried rice home cooks can make. Day old rice is drier and separates into individual grains more readily than fresh rice. Fried rice made with fresh rice gets clumpy and soggy.

If you don’t have day old rice hiding in your fridge from your last delivery order, simply make some before you get started on the prep work. Be sure to rinse the rice before you cook it in a fine mesh strainer until the water runs clear, which removes extra starch that can make rice gummy. Cook it according to the instructions on the bag or your rice cooker if you have one. Once it’s done, spread the rice out onto a baking sheet to allow it to cool and dry. Just an hour or even only 30 minutes of drying rice like this will get you nice individual grains of rice that won’t clump together. Bonus points if you cook the rice in chicken stock with garlic and ginger for extra flavor.

For the basil in this recipe, I encourage you to use Genovese basil, the basil ubiquitous at supermarkets or coops, rather than seeking out Thai basil for this recipe. Often, the “basil” used in Thai stir fries is holy basil, which has a peppery quality far more similar to Genovese basil than the anise flavor in Thai basil. 

Ingredients:

1 package (about 1/2 lb.) France 44 duck confit, shredded

3 tablespoons France 44 Duck Fat or a neutral oil

2 cups day old or cold white rice

2 Locally Laid Eggs

1 medium shallot or 1/4 red onion, diced

3 cloves of garlic, minced

1/2 red bell pepper, diced

4 Thai chilis (optional), sliced

1/4 cup pineapple, diced

1/2 cup basil, small leaves left whole, large leaves torn


For the sauce:

2 tablespoons soy sauce

1 tablespoon dark soy sauce for color (optional)

1 tablespoon fish sauce

1 teaspoon of sesame oil

1/2 tsp of sugar

1/8 teaspoon of white pepper (optional) 

A fairy dusting of monosodium glutamate (optional)

After you’ve prepared all your ingredients, place a pan or wok over high heat until screaming hot, about two or three minutes. Open your windows or turn on your kitchen hood. Add one tablespoon of the duck fat or cooking oil and swirl it around the sides of the pan. This is a technique known as longyau (熱油), and it helps make the wok non-stick. Add the eggs along with a pinch of salt and allow them to set for a few seconds, then scramble into fine curds. Remove from the pan and set aside when they are just barely cooked and still moist.


Wipe out the pan, add the rest of the duck fat and longyau again. Add your garlic and shallot and stir for about 30 seconds being careful not to burn the garlic.


Add the bell pepper and Thai chilis and stir fry for 30 more seconds. If you wanted to add or use other vegetables, add them in terms of hardiness, stir frying as you go for about 30 seconds each. Say you wanted to add carrots, corn, and frozen peas, add them in that order.


Add the rice to the pan before pouring the sauce around the sides of the pan. Toss to combine. I liked to flatten and press the rice along the bowl of the wok and leave it until I hear it crackle. This pan searing results in nice caramelization and crispy bits in the final dish. If you notice liquid in the bottom of the pan or wok, keep stirring the dish until it has all cooked off. Moisture is the enemy of a good fried rice.


Lastly, add the pineapple, basil, and shredded duck confit to heat through while preserving the color and delicate perfume of the basil, about 30 seconds. Serve immediately.


For plating, consider packing a small bowl with the rice and turning it upside down on a plate to create a dome. Garnish it with crushed peanuts and finely sliced spring onions or whatever else you’d like.

Order Online